Please click here to get started. Fill in the form with the relevant details and click continue at the bottom to create the page.






Please click here to get started. Fill in the form with the relevant details and click continue at the bottom to create the page.
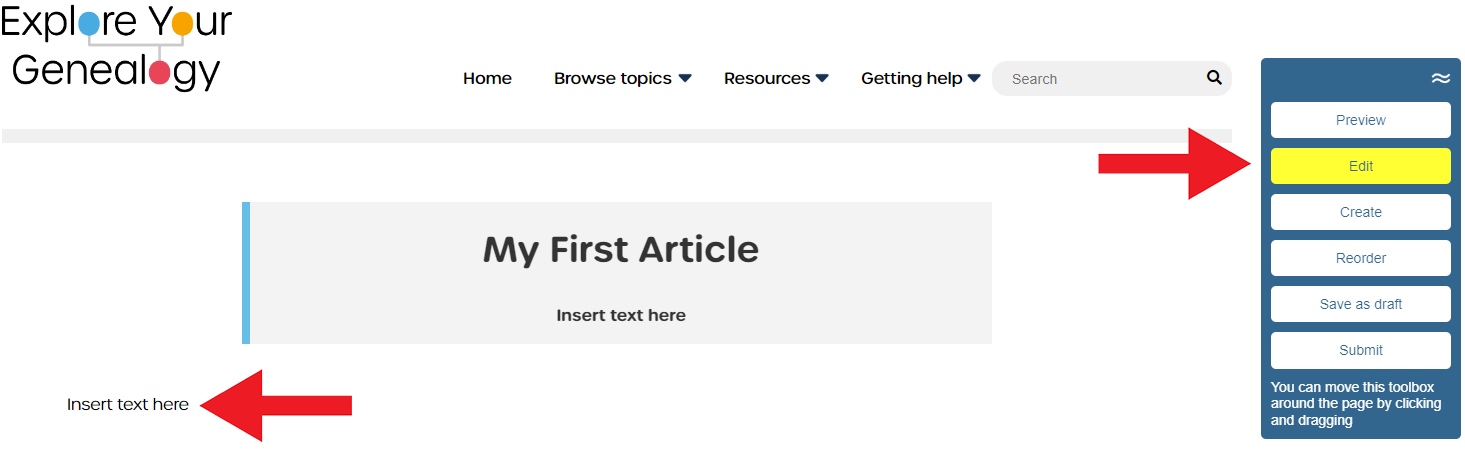
Click the edit button on the menu (you will know which mode you are in as the button will be highlighted yellow) and click on any of the text to start editing it.
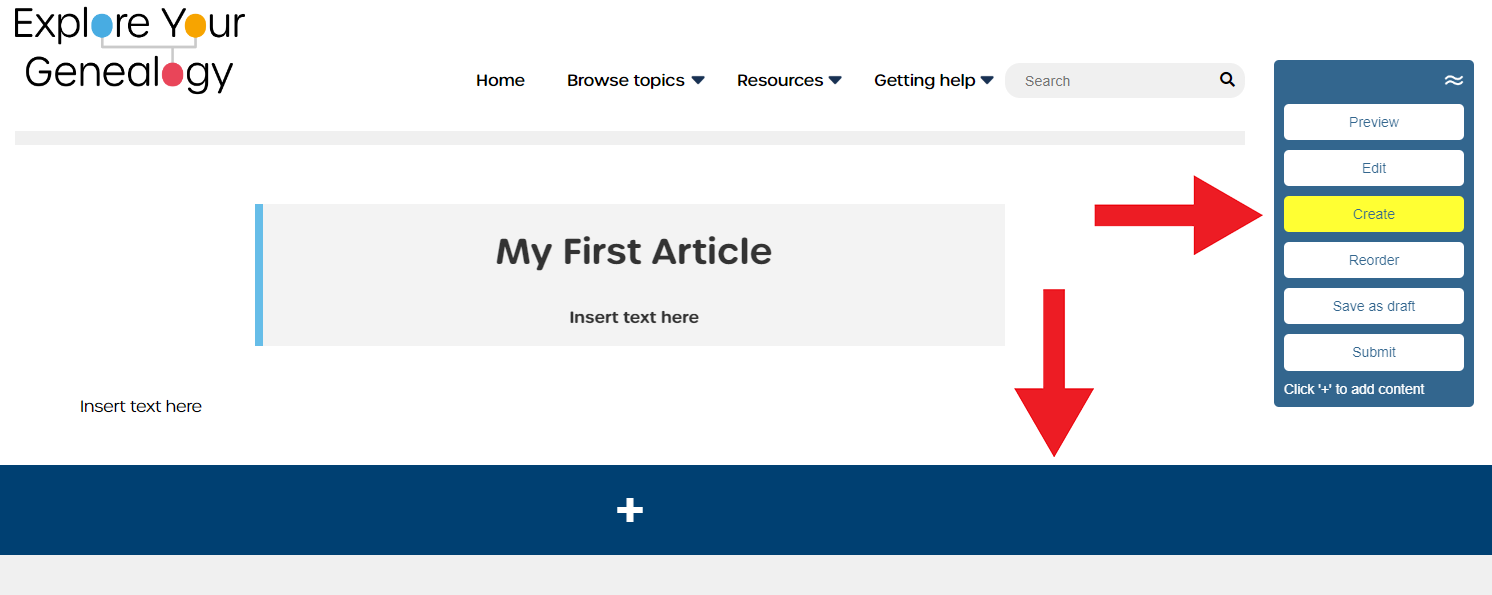
To start adding more sections click the "create" button and then click the big blue bar that will show up to get a selection of templates to choose from.
Now choose which template you would like to use and click on it to add that template to the page.
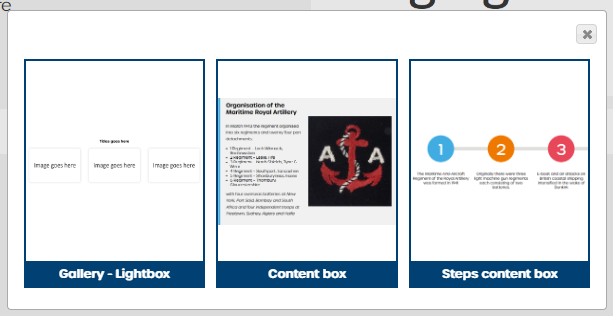
You can now start editing each template by clicking the temporary text and images.

You can click the "Reorder" button to go into a mode that will allow you to rearrange the sections by clicking and dragging.
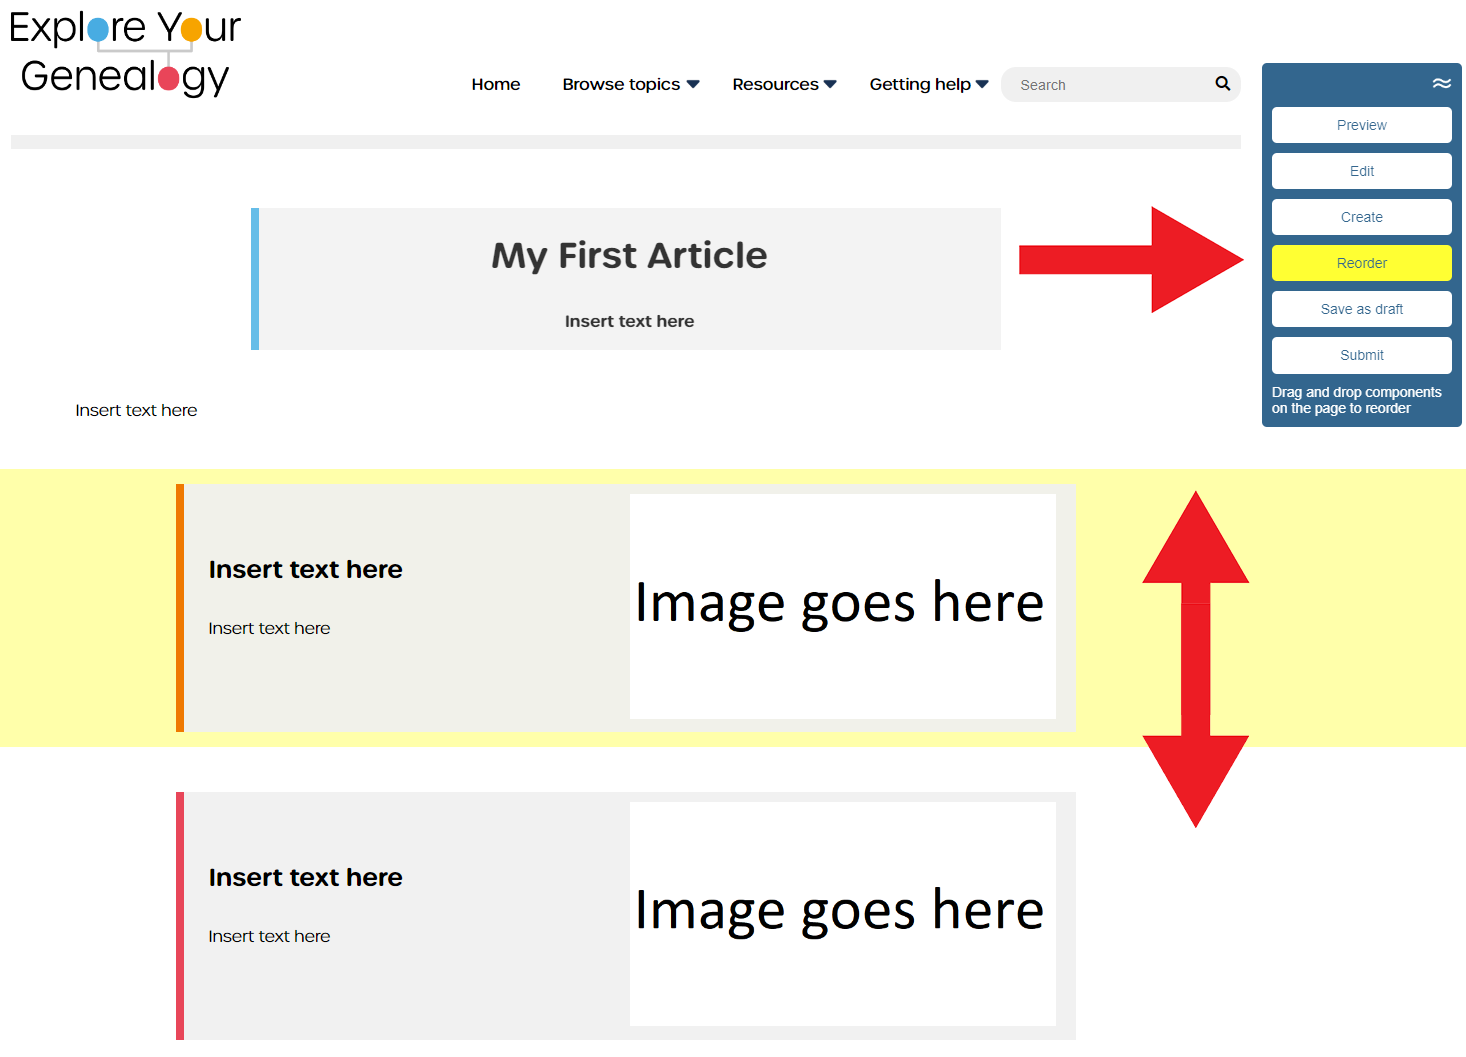
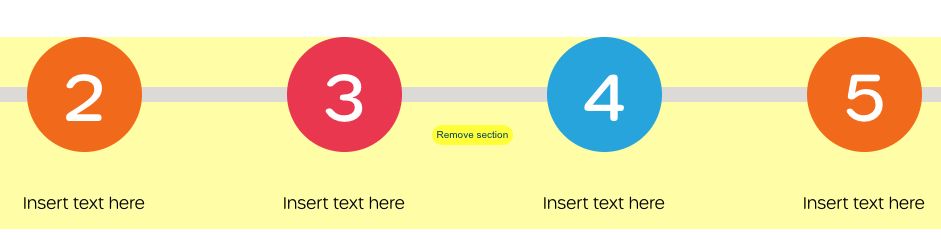
By clicking 'Reorder' you can also remove unwanted sections by clicking the 'Remove section' button.
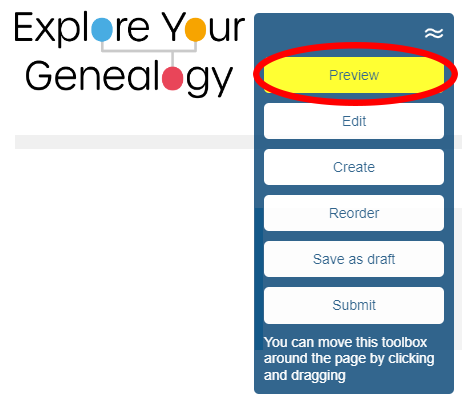
Clicking the "Preview" button on the menu will show the article as it would normally be shown outside of the editor.
After you have finished writing your article you can either "Save as draft" which will save the article so you can come back to it later, or you can click "Submit" and the page will be submitted for review to be added.





Registered Office: 2 Primrose Avenue, Urmston, Manchester M41 OTY
Email: admin@familyhistoryfederation.com
©2026 Explore Your Genealogy